BLOG
Technical Teardown: Sensirion Particle Matter Sensor
WRITTEN BY ANGELA MAY, FORMER MECHANICAL ENGINEER AT MISTYWEST
We had the recent opportunity to tear down a Sensirion SPS30 Particle Matter Sensor. This was exciting for us as we have experience developing particle sensors, and we haven’t seen air quality sensors in such a tight form factor.
The device boasts “superior accuracy” in an “ultra-slim package”, and we were keen to learn how this is achieved. We bought the Sensirion with our own funds – that’s right, this is not a sponsored post!
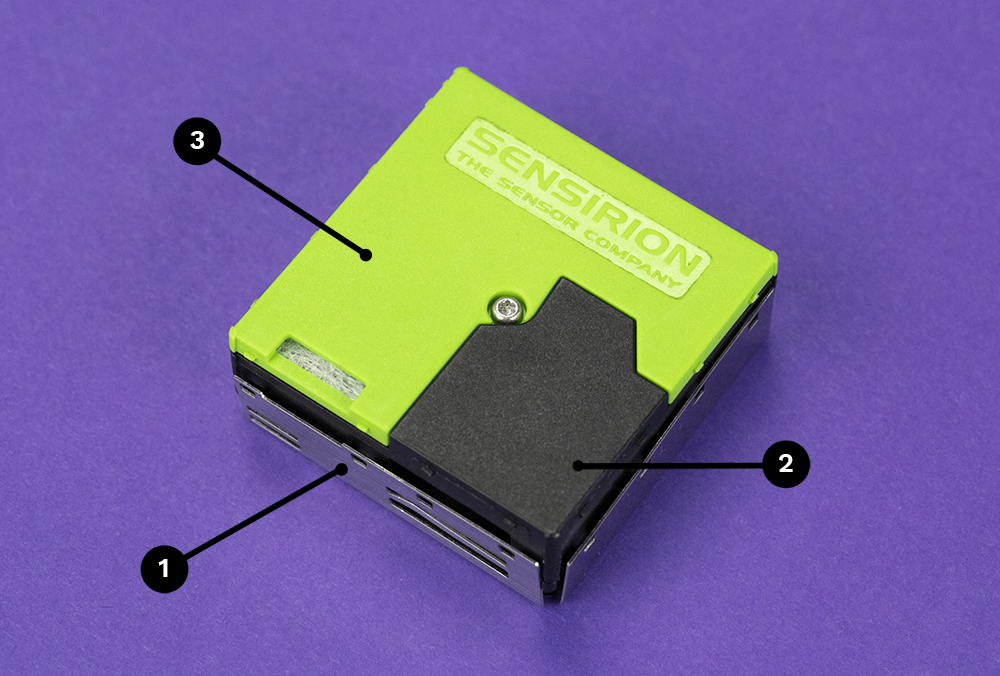
Part 1 is a bent aluminum sheet metal outer case. Our team couldn’t discern what the true purpose of this sheet metal piece was. Our expert hypotheses:
- It’s possible that this is used for additional rigidity/physical protection, but the plastic enclosure (Part 2) on its own does seem quite rigid.
- No wires are connected to it, so we don’t believe this was used for grounding or electrical shielding.
These grates are used to either limit the amount of incoming airflow, and/or to protect against the ingress of larger particles or debris.
Part 3 is actually a tiny HEPA filter that is used to purify the incoming “sheath air” that we will describe in a later section.
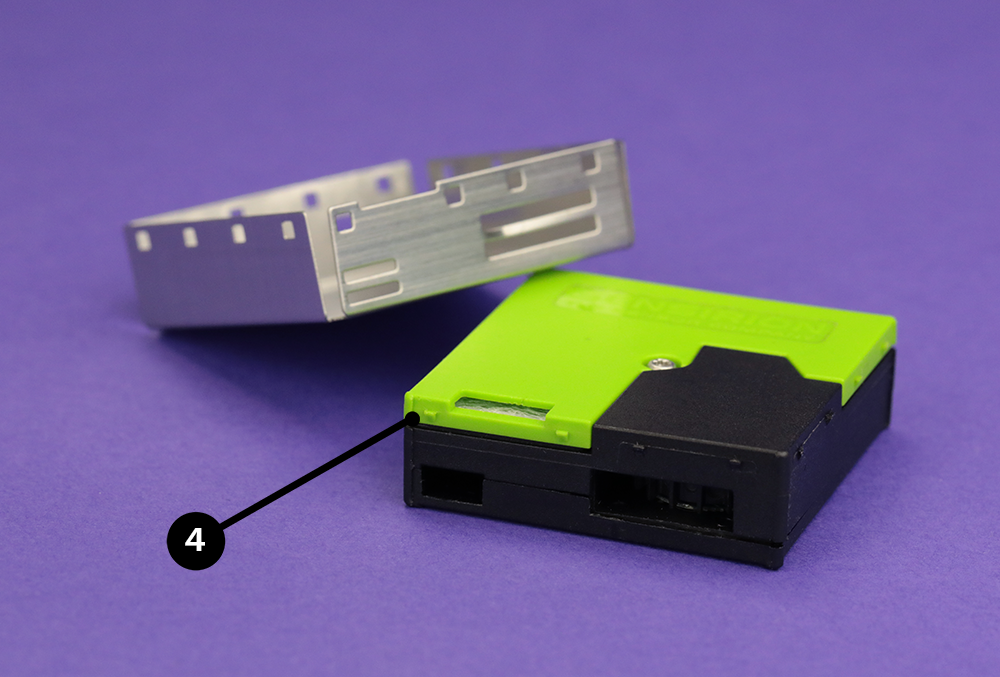
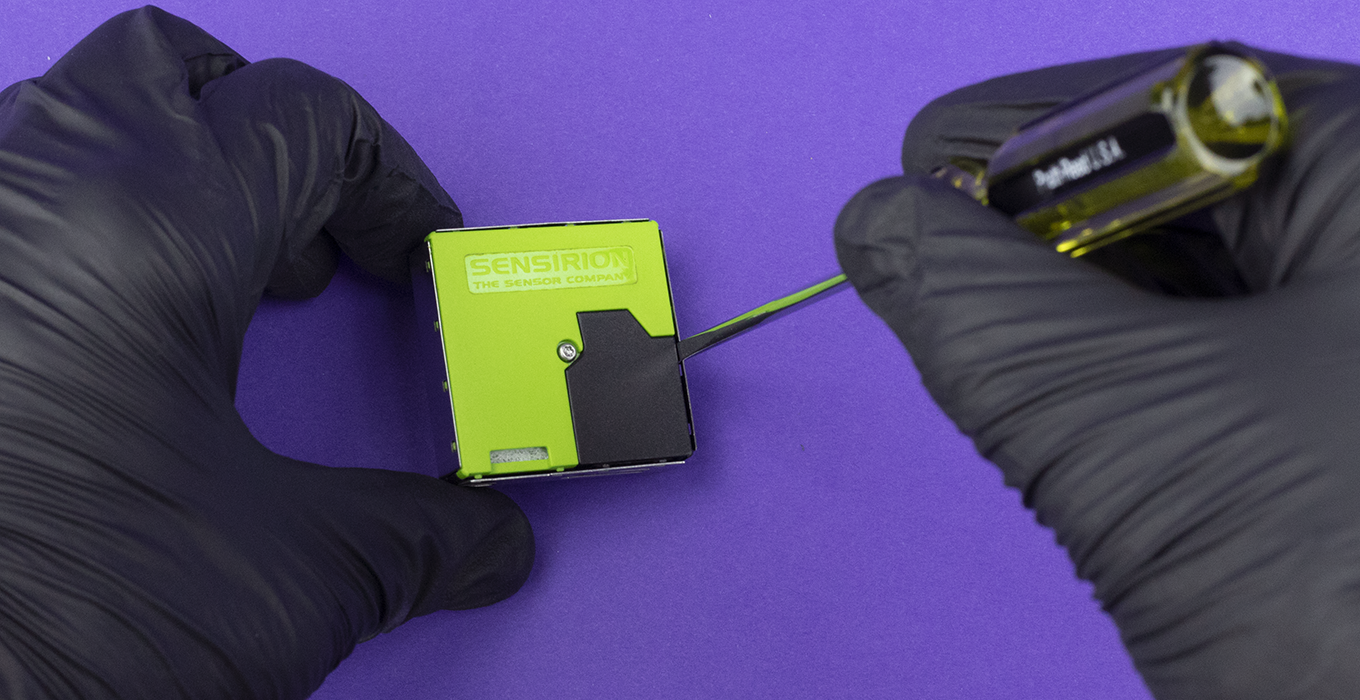
The aluminum shield pops off the rest of the enclosure with a bit of careful prying. Tiny notches on the top of the enclosure (Part 4) hold it in place.
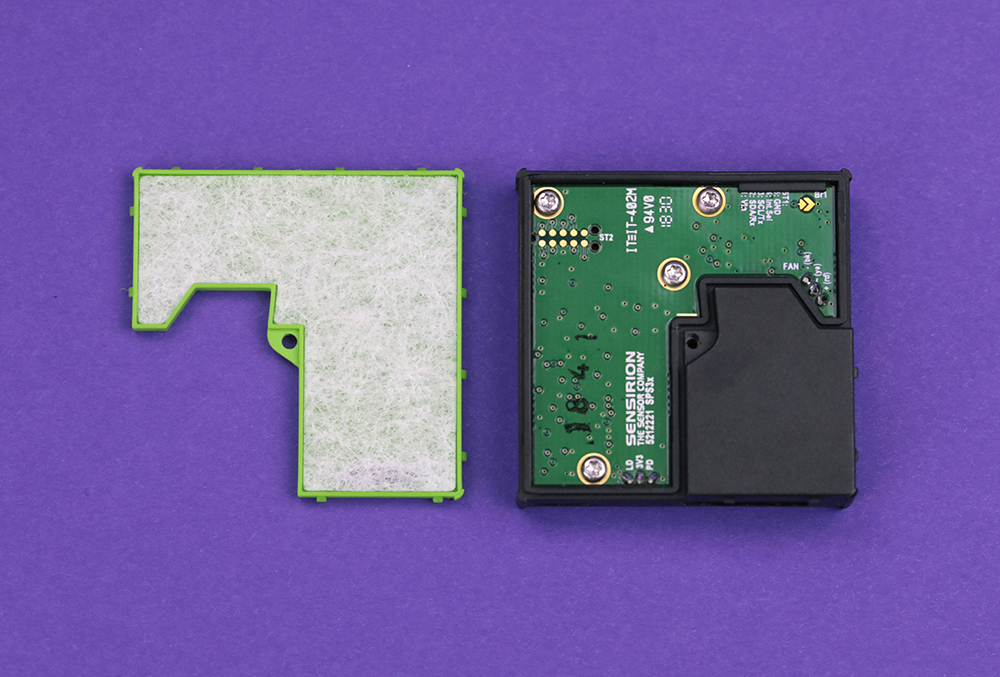
As we remove the centre fastener, we can get a good look at the HEPA filter underneath the bright green shield.
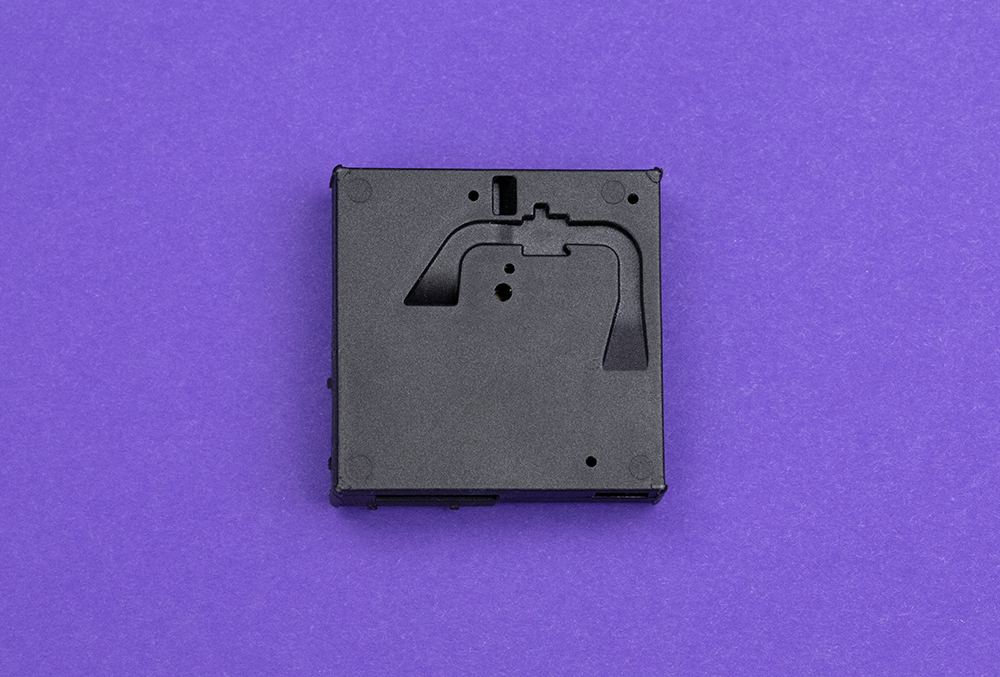
The underside of the device reveals the mirror of the flow channel that we’ll examine later on. This feature is used to create a consistent wall thickness when the device is injection-moulded.
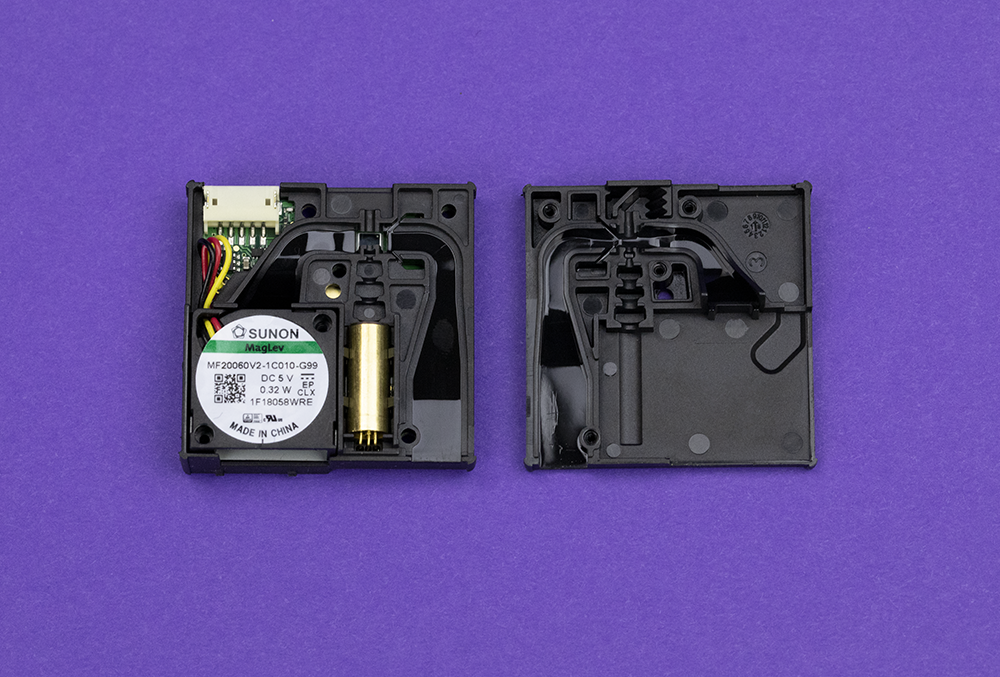
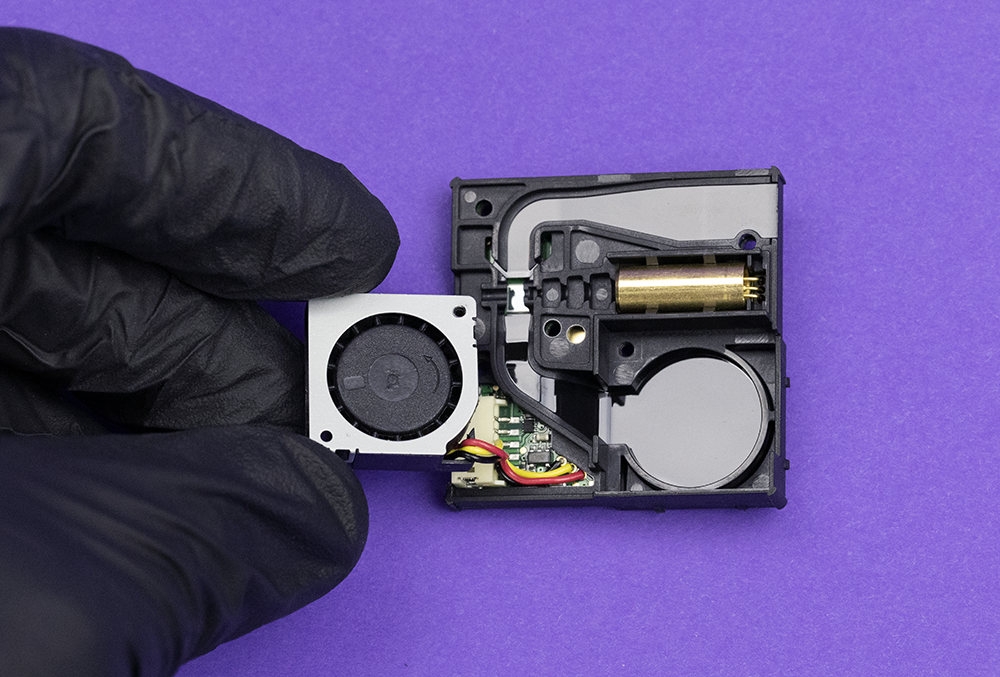
A few more fasteners are all that stand between us and our ability to admire the sensor’s internals, shown here in two halves.
Now we can really dive into how this little sensor functions.
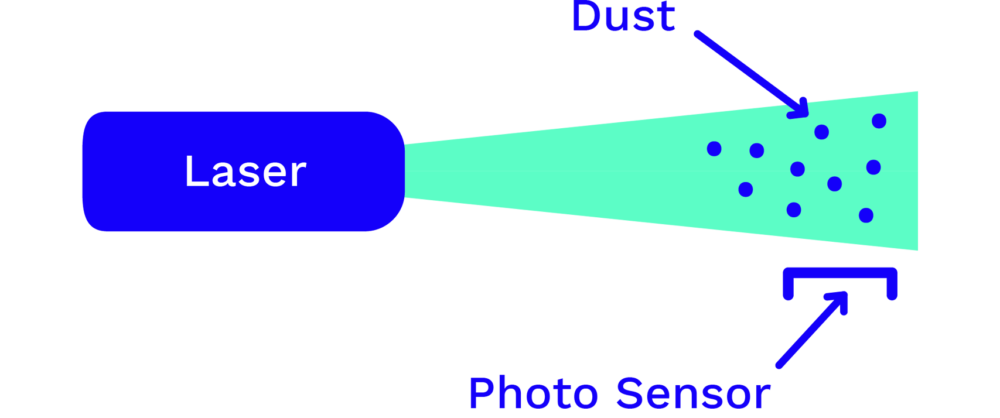
This is an optical particle sensor. A stream of air is sucked in and then channeled across a laser lightbeam, and the laser will reflect on any particles that are in the airstream. Those bright spots can then be detected by the photoresistor underneath. By “counting the bright spots” the sensor can give us an indication of how much particulate (pollution) is in the incoming airstream.
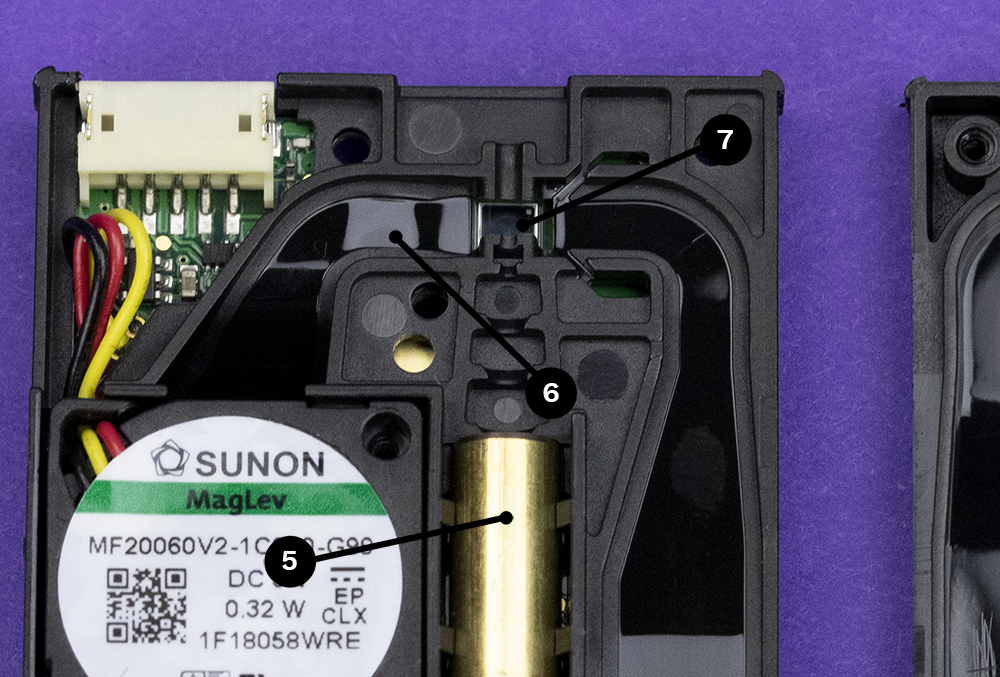
We can see these features in the Sensor. The laser (Part 5), the airflow path (Part 6), and the photosensor (Part 7).
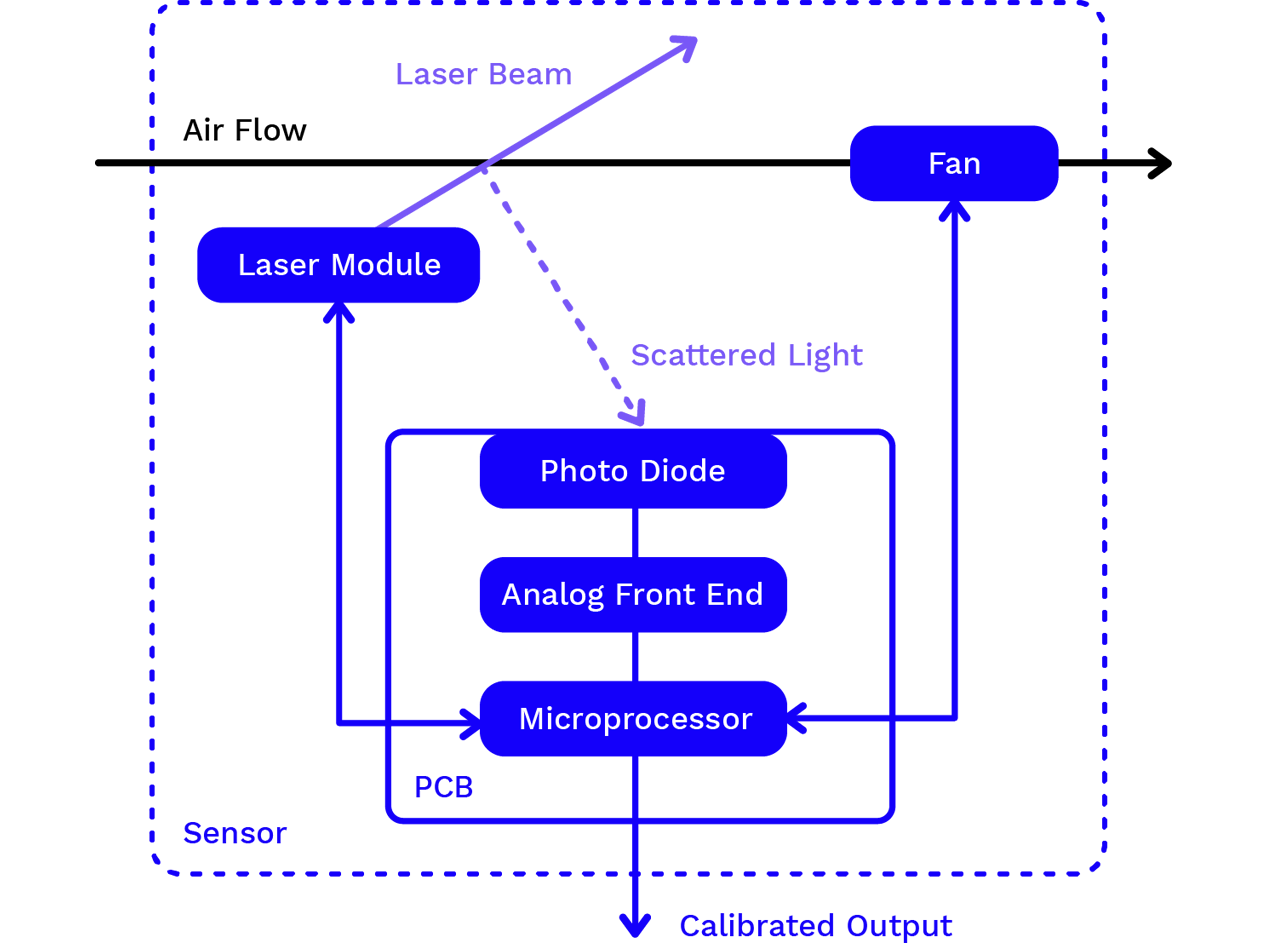
From an electrical perspective, here is how the device is controlled.
The key things that you need to include in this type of design are:
- Preventing turbulence/backflow in your airstream
- Preventing dust accumulation (which is related to item 1)
- Keeping your photodiode clean
- Managing the laser light safely
How did Sensirion manage these considerations in the sensor?
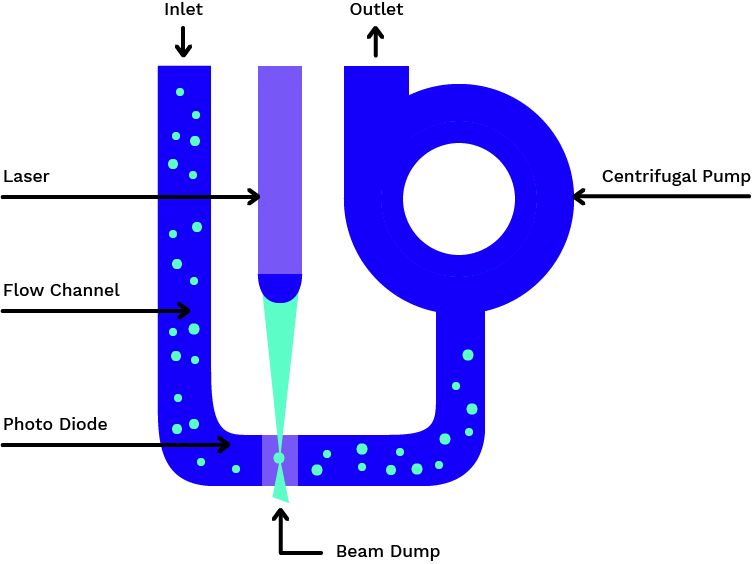
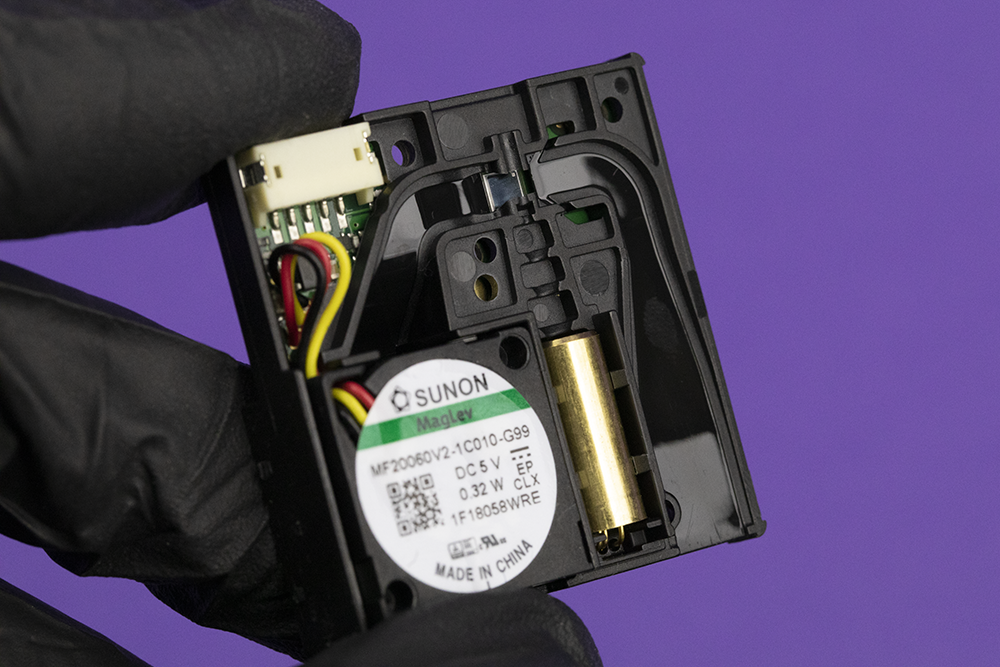
First, let’s look at the airflow. A look underneath the Sunon fan gives us a better view into how it works; this is a miniature centrifugal fan that is actually pulling the air in through the system.
There is a small pocket underneath the fan that acts as its inlet. The air is then pulled up through the fan and exhausted out the other side.
The INLET has a distinctive shape that is used to try and create laminar flow in the airstream.
The reduction in cross-section is very gradual and the radius of the curve around the corner is designed to prevent turbulent flow. This is important, because turbulent flow can cause backflow, which can introduce errors into the readings, such as particles going back and forth over the sensor. Turbulence can also cause dust particles to get stuck in the corners, which would degrade the performance of the unit over time.
The other feature you’ll notice in this entire airflow channel is a near-mirror finish. It’s possible that this was achieved with a post-mould coating, but our team believes that this was created by polishing the injection mould tool to a precision finish. You can note this mirror finish on both the top and bottom sides of the channel.
But where does the HEPA filter come into play?
We believe that the HEPA filter is used to create sheath air.
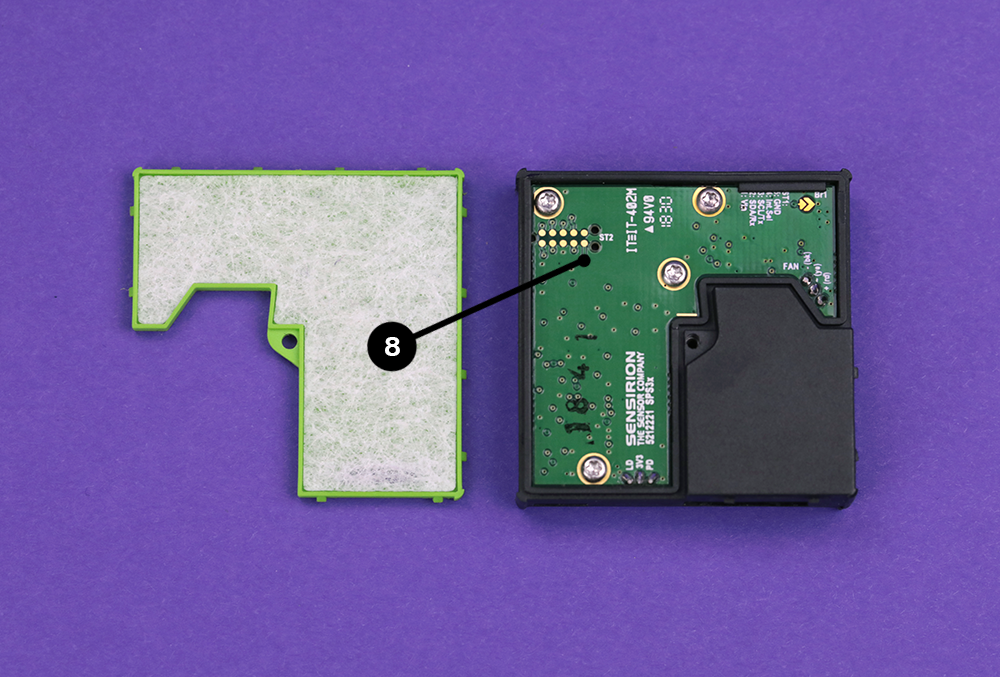
Air is pulled by the same fan through the HEPA filter, flowing through over the top of the PCB. We believe that it then flows down through these small holes (Part 8). The primary function of these holes looks to be originally intended for alignment of a programming connector, however, this could be a dual purpose inlet for the sheath air.
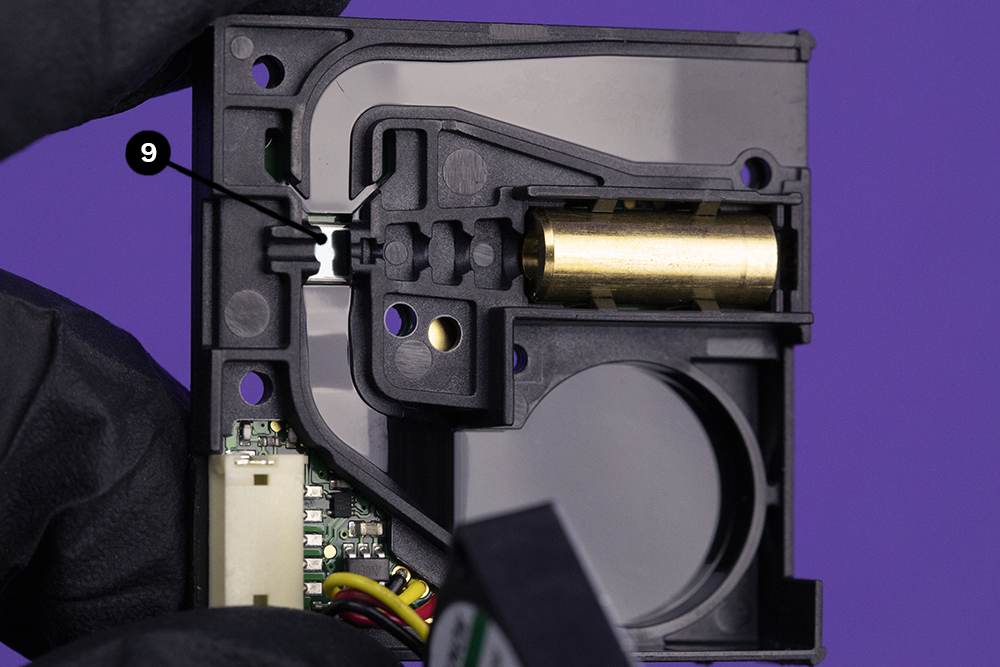
This clean air is pulled over the photosensor (Part 9) on a continuous basis, which helps keep it free of dust accumulation (which, as we previously mentioned, is one of the main sources of error in this type of sensor).
Next, let’s examine the laser.
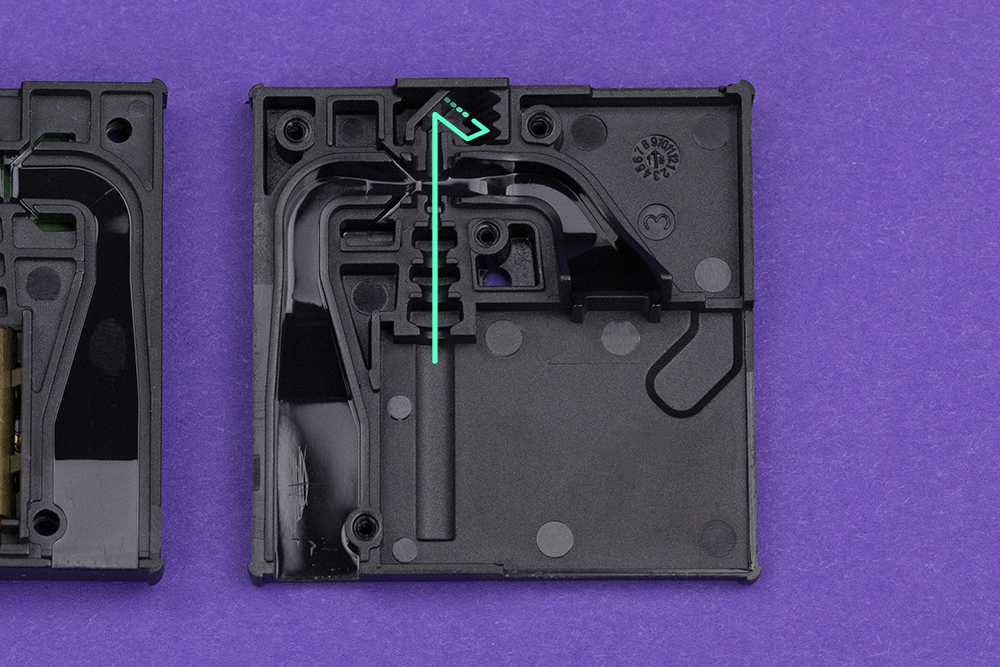
The laser is held in the enclosure by tight-tolerance crush rib features. These permanently deform as the laser barrel is installed. The light passes through a series of baffles, which helps reduce scatter and creates a clean focused beam that will pass over the photodetector.
On the other side of the photodiode, we can observe the beam dump feature. Laser light will enter this chamber, and due to all the sharp angles and dull surface finish, will bounce around and continue to scatter until it has safely dispersed.
Conclusion
All in all, our team was impressed with this sensor – it has a lot of great precision features in a form factor that will enable a lot of interesting applications. Great job, Sensirion!
And again… this is not a sponsored post.
Photography by Denis Godin.
